Refresh data in Power BI reports
When you publish a report, Power BI will not automatically update the data in the report from Sage 200.
To make sure that your reports shows up-to-date information, you'll need to:
-
Set up an on-premises data gateway in Power BI.
-
Set up a refresh schedule so that Power BI can refresh the data in your reports and dashboards for you, or refresh the data manually.
Set up an on-premises data gateway in Power BI
The on-premises data gateway connects your data in Sage 200 and the Power BI Service.
You will need to install the on-premises data gateway and configure it for the Sage 200 custom connector.
Requirements
You can find requirements and further information about the on-premises data gateway in the Microsoft documentation: On-premises data gateway (opens in a new tab)
-
We recommend that you install the gateway on a computer that is always on (such as your server), since the gateway will not be able to refresh your data if it is turned off or asleep.
Install the gateway
You can find more information about installing the on-premises data gateway in the Microsoft documentation: Install a gateway for Power BI (opens in a new tab)
-
Download the on-premises data gateway from Microsoft.
Download the Microsoft on-premises data gateway (opens in a new tab)
-
Install the application.
-
Choose the recommended option to install On-premises data gateway (not the personal mode option).
-
-
Sign in using your Microsoft account. Use the same account as you use for the Power BI Service.
-
Enter details for the on-premises data gateway.
-
Enter a data gateway name, such as "Sage200DataGateway", and a recovery key.
-
-
Once the data gateway is set up, you'll need to set up access to the Sage 200 custom connector.
-
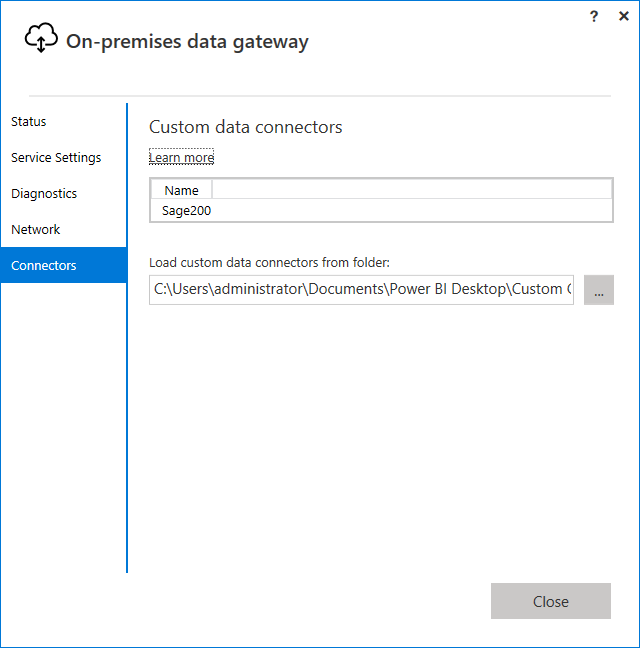
Move to the Connectors tab.
-
The gateway uses a service account PBIEgwService to connect to the Sage 200 custom connector.
The gateway will show a folder where it expects to find custom connectors, for example C:\Users\PBIEgwService\Documents\Power BI Desktop\Custom Connectors.
You must change this default folder to the location of the Sage 200 custom connector. Select ... and browse to the folder that contains the connector. By default, this is installed to Users\(your username)\Documents\Power BI Desktop\Custom Connectors\.
Once the gateway finds the Sage 200 custom connector (Sage200.pqx) in that folder, it will display Sage200 as a custom data connector.
-
Give the service account PBIEgwService permission to access the folder that contains the Sage 200 custom connector.
-
Browse to the folder in Windows Explorer, then open its Properties and move to the Security tab.
-
Add the group Everyone and give it permission to Read the folder.
-
-
Set up the Sage 200 custom data connector
You can find more information about setting up custom connectors in the Microsoft documentation: Use custom data connectors with the On-premises data gateway (opens in a new tab)
Once you have installed the on-premises data gateway, you must configure it in the Power BI Service.
-
Sign in to the Power BI Service.
-
Select Settings (in the toolbar), and choose Manage gateways.
-
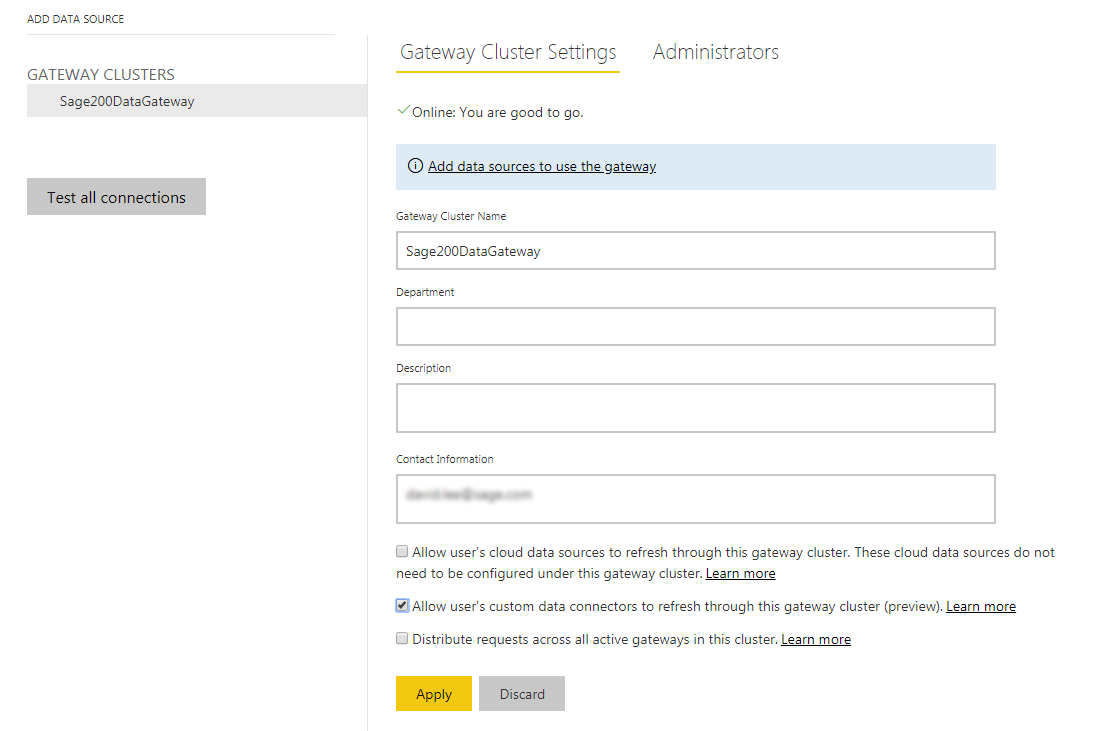
Select your gateway name, such as Sage200DataGateway.
If you only have one gateway, then it will already be displayed.
-
Select the option to Allow user's custom data connectors to refresh through this gateway cluster, then select Apply.
-
Select Add data sources to use the gateway.
-
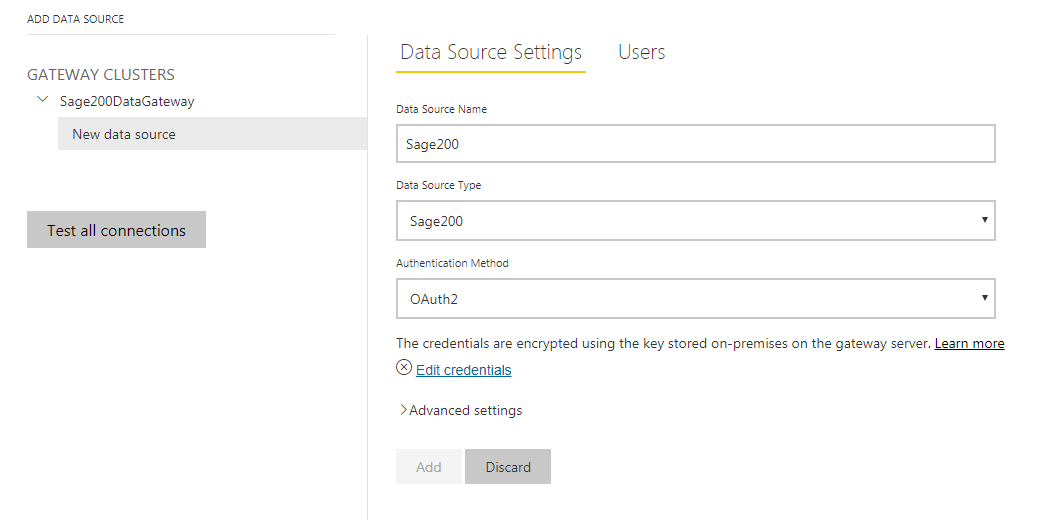
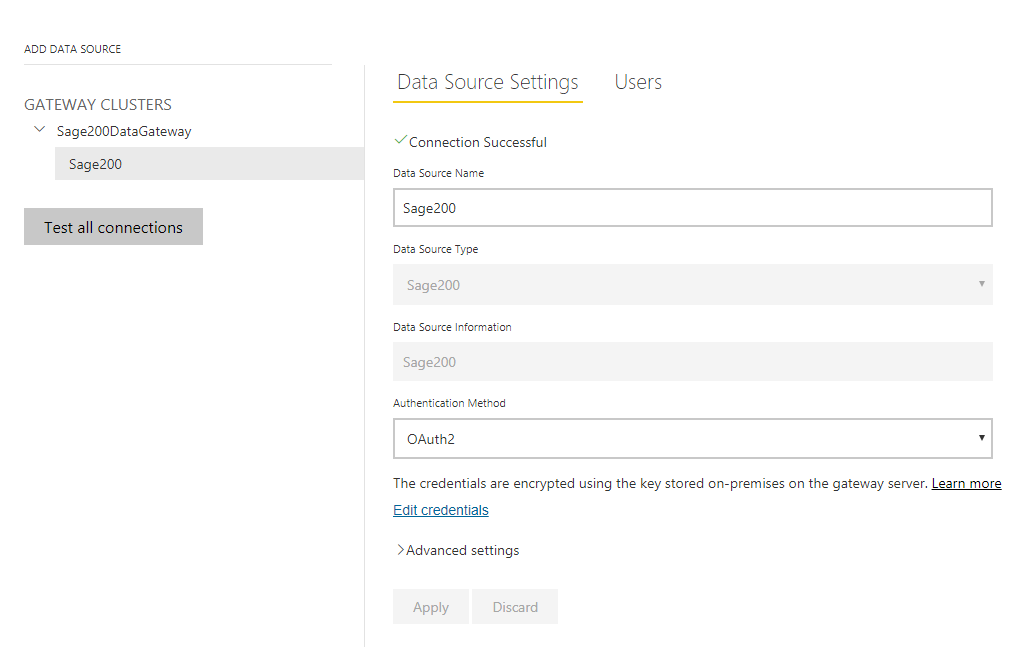
Enter the Data Source Name, such as Sage200.
-
Set the Data Source Type to Sage200.
Tip: If Sage200 is not in the list, go back and check that the option Allow user's custom data connectors to refresh through this gateway cluster is selected for the gateway.
-
Select Edit credentials.
-
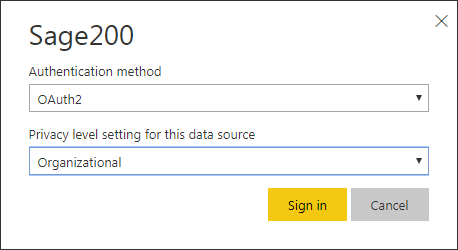
Set the privacy level to Organizational.
-
Select Sign in, and sign in using the same Microsoft account that you used to set up the gateway.
-
-
The Power BI Service will indicate if the connection is successful.
-
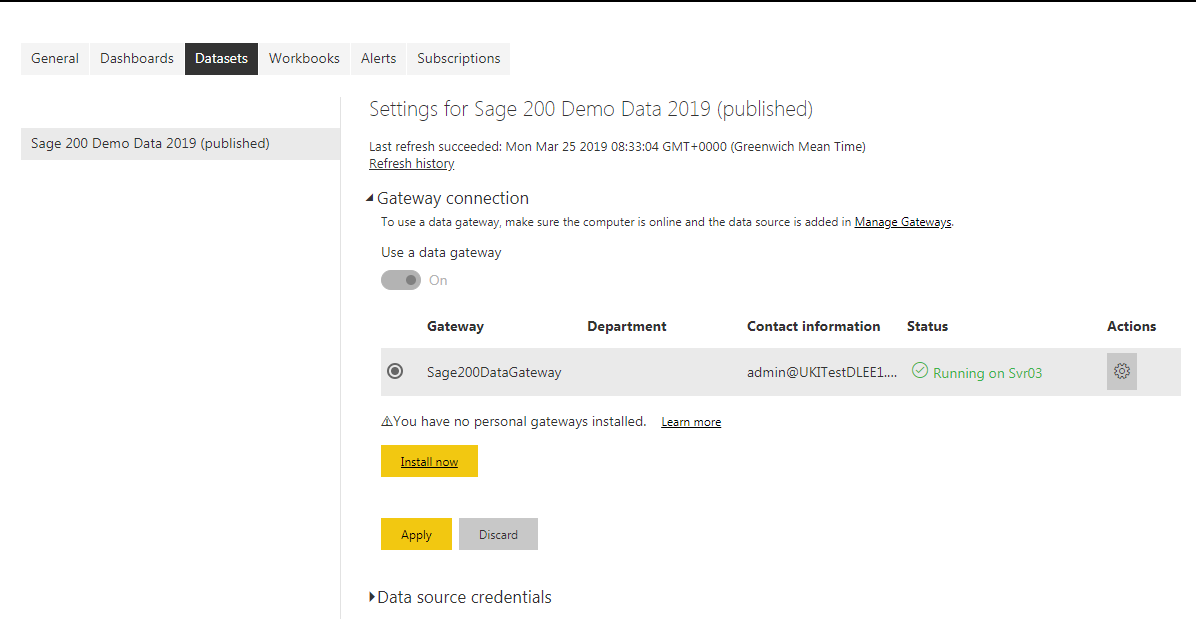
Select Settings (in the toolbar), and choose Settings.
-
Select the Datasets tab, then open the Gateway connection settings.
-
Check the settings for your gateway:
-
Set Use a data gateway to On.
-
Select your gateway, then select Apply.
-
Refresh your report data
You can find information about refreshing data in the Microsoft documentation: Data refresh in Power BI (opens in a new tab)
After installing and setting up the gateway, you can now refresh your report data from the Power BI Service. You can refresh the data automatically by setting up a schedule, or refresh the data manually.
-
Sign in to the Power BI Service.
-
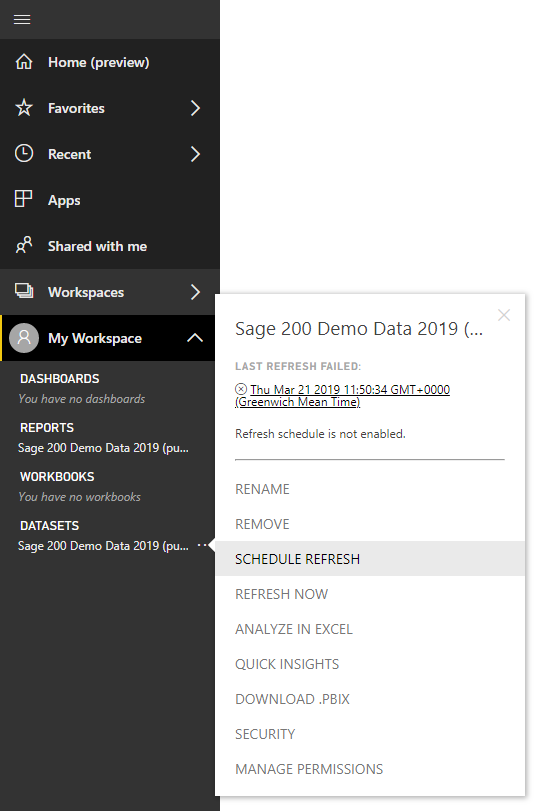
Browse to the workspace where you publish your reports, and find the Dataset that you want to refresh.
-
Select the menu ... for the dataset and choose how you want to refresh.
-
To set up a schedule to refresh the dataset automatically, select Schedule Refresh.
-
To manually refresh the dataset, select Refresh Now.
-